Sunday, 4 January 2015

...and the final page!

Finally after eight months the guitar has gone to her new owner, my brother.  Not much to write on this one!

 Here he is unwrapping it...

 Opening the box...

 
 Lifting it out...

 A quick strum...

 Closer inspection...

 Showing it off...

 "What a guitar but no pick?  What kind of half-assed job is this!"

At last having a play...

And then later, a facebook comment, which I think says it all

Thursday, 1 January 2015

Getting ready to go to its new home.

Well after lots of tweaking and thorough testing I've blagged an old guitar box from a local music shop and packaged her away.


Here she is next to my first build project


In her well padded box ready for the journey across country to her new home with my brother.


Last bit of padding before I seal the box.

Tuesday, 9 December 2014

All done!

Well after quite a few months of work, and some big learning curves the guitar is now complete!


It has quite heavy strings on it to bring out the acoustics and it works well.  It is, as you would expect, much louder acoustically than a solid body guitar and amplified it has some wonderful warm and or bright classic tones despite being relatively cheap (£17 each or £30 for a pair) Vanson toaster PAF style pick ups - The neck is a '57 spec alnico II, and the bridge is '59 spec alnico IV with 0.022uF polypro capacitors and they are wired independent so you can blend them better when both pick ups are selected.

Here it is along side the Lils Paul kit we made last year.

All in all it has been a fab project built with only a few basic hand/power tools and it proves that if you're willing to give it ago, anyone with a bit of enthusiasm and patience can build a fab instrument!

Here's a video a quick video going through the various pick up selections both clean and dirty.   Bear in mind that it was filmed on a phone so is not massively representative of the actual tone.  My playing, like my building, is more enthusiastic than good so that doesn't really help either...


Anyway I hope you've enjoyed this blog, feel free to leave any comments and I can't wait to start my next project! :-)

Monday, 1 December 2014

Nearly there...


Okay, it's all wired up.  I pre-wired it using this ply template which I used on my previous kit builds.  I had hoped to fit push/pull pots on this project too.  The pick ups are 4 wire ones so I could have had split coil or series/parallel switches on them.  However I couldn't fit them into the acoustic chamber with the top glued down so I had to go for the basic standard wiring.


I then carefully fed the controls into the body through the bridge pickup cavity.  It was certainly fiddly but not as bad as I was expecting.  It only took about 10 minutes using a long screw driver through the jack socket hole and a pair of angled needle nose pliers through the f-hole.  The wire you can see in the f-hole got tucked up out of sight against the body using double sided tape.


I got the action all set up nicely and playing well but then BOLLOCKS #2 occurred...  The top E string kept jumping out of it's groove on the bridge.  On closer inspection it appeared that I hadn't quite lined up the trapeze tail properly.  I ended up having to carefully drill out the screw holes, fill them with dowels, fix the paintwork, and then carefully re-lined up the tail.  Once this was done the problems was sorted and it plays really well!  The paintwork is a bit patchy at repair site but it's well out of sight unless you specifically look for it.


Saturday, 22 November 2014

Putting it all together...

Well that's the neck bolted on and the locking strap hooks fitted
 

 Bridge and tail, yeah I signed the pickup cavity, you never know I might be famous one day...


Strings are on and the nut height tweaked, although there is one slight problem...


BOLLOCKS!!!! The neck socket is too deep, I'd like to blame the issues I had with my router but I can't really, at the end of the day I measured it out wrong.  I think the mistake I made was in the blending of styles.  I measured the socket to look like it does on my Les Paul with the finger board sitting on the body.  However the bolt on socket style I actually copied off my Yamaha where the finger board sits above the body.  Ah well live and learn and it's not a complete loss as I can fix it!


Using some of the sound board off cut I made a piece to go under the neck that follows the contours of the body thus lifting it up a perfect amount.  I thought about painting it to match the body but thought that given the amount work involved in blending the colour on the body it might look patchy whereas leaving it natural makes it look deliberate.  I sealed it with the matt lacquer before fitting it.

*edit 21/11/2015* I have since found out that I didn't actually route the neck socket too deep.  In my inexperience I didn't account for the fact that a tune-o-matic style bridge is much taller than the Yamaha RMPro2 bridge, that and the lack of carving on the top.

Saturday, 15 November 2014

Finishing the headstock and neck

As this is a wedding present I made their wedding date the serial number


Using a dremel hobby drill I engraved their names into the maple in an American diner font.  It's a little shaky but not bad considering I did it free hand


And then carefully, with a fine brush I painted in some chrome paint.  It looks more like silver but it still pretty against the red background.


Next job is to cut the bone nut that came with neck.  I used a pencil sliced through the middle and run over the frets to work out the string slot height.  I also leveled the frets with an oil stone and re-crowned them with a needle file.

For love nor money I couldn't find a simple chrome truss rod plate so I bought a small off cut of mirror finished stainless steel off eBay.


30 minutes of playing with hacksaw, file and drill and hey presto - one shiny truss rod cover!


Friday, 3 October 2014

Adding some colour

My brother and his wife-to-be love the '50s American diner style, hence all the chrome hardware, and have requested the guitar to be in red, they also want to be able to see the wood grain through it...

It took me a while but I eventually managed to find the right colour - Cadmium Red.  It's an acrylic paint so can be watered down so hopefully I'll be able to create a burst effect like I did with the ink on my previous build, thus showing the wood grain off without losing too much of the colour depth.

Because I will be watering the paint down one of the first jobs I need to do is seal to the end grains with neat acrylic.  Once dry it will be water proof and will stop the grain from lifting and splitting when it gets wet.


After filling the router gouges I painted a light undercoat to hide the filler.  I deliberately kept it light in order to keep the wood grain visible.  The filler was made by combining saw dust from the build with PVA wood glue.  Not strictly necessary but no harm in making good use of the waste saw dust.


And we now have a rich bright red that still shows the grain pattern through it.


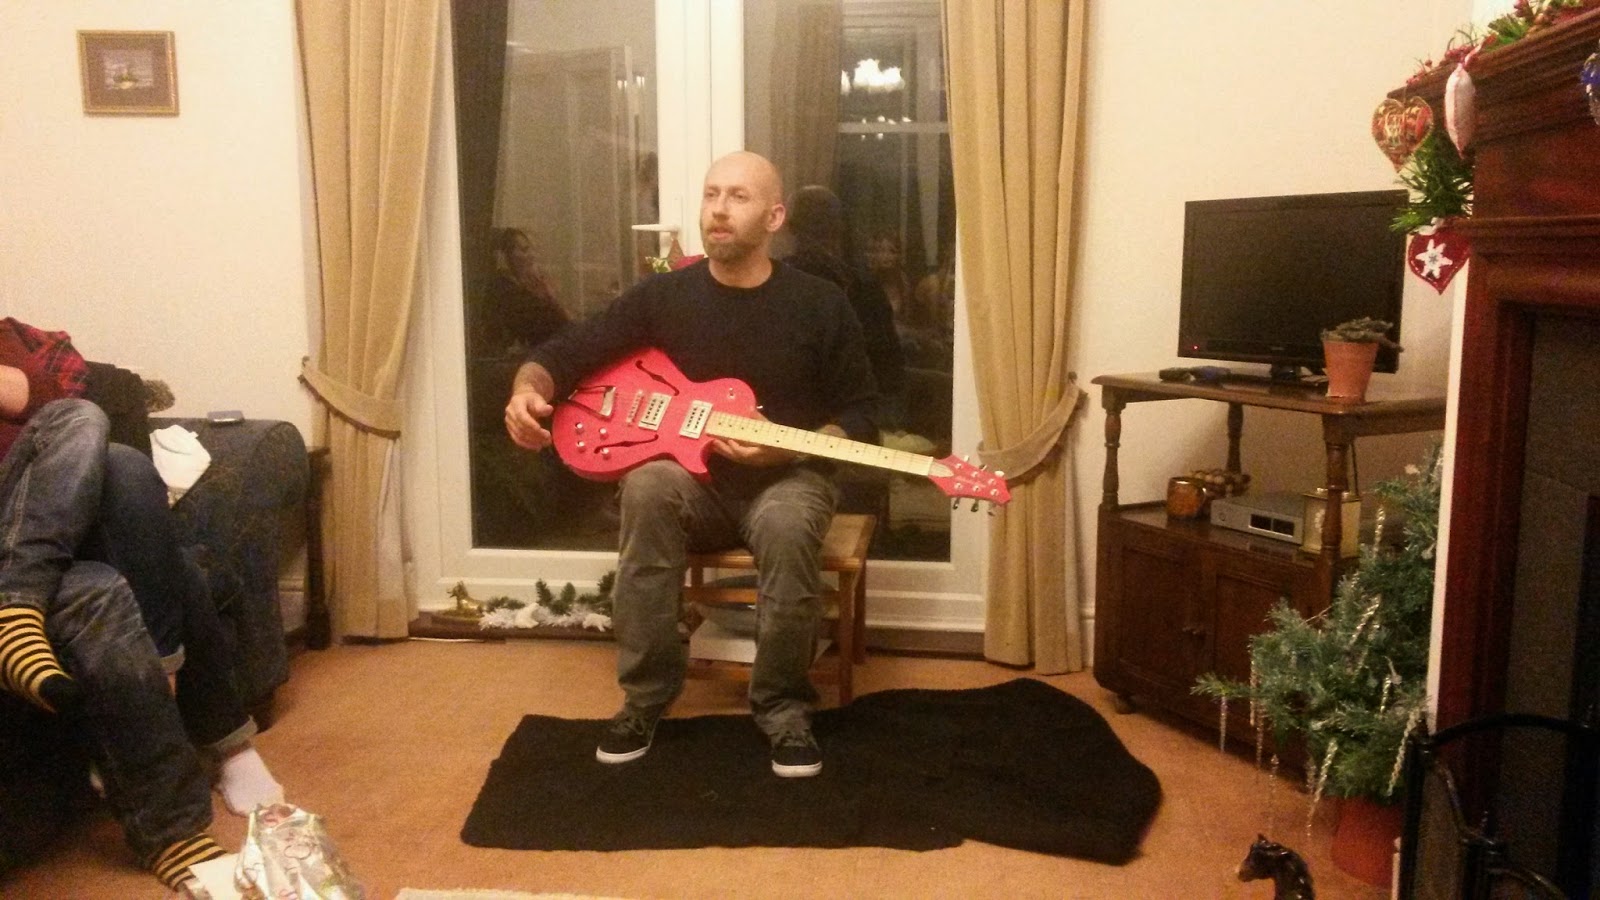
After a month of layering, blending and layering, blending again and again the front hasn't come out quite as well I was hoping.  Whilst the acrylic watered down easily enough and definitely allowed the wood to show through towards the centre, it didn't blend so well towards the edges.  It doesn't look bad, it's just the transitions are not as smooth as I was hoping for.  Anyway I'm still loving the contrast of the chrome fittings when they are in place!

Once I was as happy as I could get with the paint I sprayed ten coats of a clear matt lacquer on to protect the finish.  I opted for matt spray over gloss as I wanted it to contrast against the shiny chrome.